Brand New Installation
Install Required Programs
- Click this link to download PDFCreator: PDFCreator Setup
- TaxColl2k uses this utility to export some reports to PDF.
- If everything went correctly, you should get a message from your browser asking if you want to "Run"/"Open" or "Save" the file.
- Choose "Run"/"Open" then click the "OK" button. The file will download.
- After the download finishes, the setup file will start automatically. Windows or an anti-virus program may ask if you are sure you want to run the file. You may also need to provide an administrator password, depending on how your computer is set up. Press "OK" or "Allow" as necessary to allow the setup program to open.
- Click this link to download the latest copy of our full installer: TaxColl2k Setup
- If everything went correctly, you should get a message from your browser asking if you want to "Run"/"Open" or "Save" the file.
- Choose "Run"/"Open" then click the "OK" button. The file will download.
- After the download finishes, the setup file will start automatically. Windows or an anti-virus program may ask if you are sure you want to run the file. You may also need to provide an administrator password, depending on how your computer is set up. Press "OK" or "Allow" as necessary to allow the setup program to open.
- Important: If you receive the message, "MS Access was not found. Please visit https://grandjean.net/updates/ to download and install Access Runtime 2013," then continue with Step 3 below.
- Only if needed, click this link to download the latest copy of our installer for use with 64-bit Office: TaxColl2k Setup (64-bit)
- Follow the same steps as listed above for the TaxColl2k Setup file
- There are two versions of Office--32-bit and 64-bit--which is why we have two different installers
- Both installers install the same version of TaxColl2k
- Important: If you continue to receive the message, "MS Access was not found. Please visit https://grandjean.net/updates/ to download and install Access Runtime 2013," then continue with Step 4 below.
- Only if needed, click this link to download a copy of the Access Runtime: Access Runtime 2016 Setup
- Download and install as you did for the previous files.
- Re-run step 2 above, "TaxColl2k Setup."
- If you receive an error message that the 32-bit Access Runtime cannot be installed because you have a 64-bit version of Office, continue with Step 5 below.
- Only if needed, click this link to download a copy of the 64-bit Access Runtime: Access Runtime 2016 Setup (64-bit)
- Download and install as you did for the previous files.
- Re-run step 3 above, "TaxColl2k Setup (64-bit)."
First Run
The next steps after installing the program will vary based on your specific situation:
- Existing TaxColl2k User Moving to a New Computer: this is for users who have TaxColl2k data files that they need to move from another computer
- Tax Collector Using TaxColl2k for the First Time: this category includes brand new tax collectors and veteran tax collectors moving from a different software package
- New Taxing District User: this is for new staff in a school district business office or county treasurer's office where other people are currently using (or previously used) TaxColl2k
Please contact us with any questions if you run into problems.
Moving to a New Computer
Please follow the instructions in transferring files from another computer if you have used TaxColl2k before and are just moving to a new computer.
Brand New Tax Collector
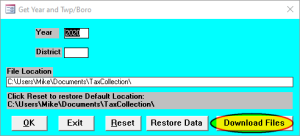
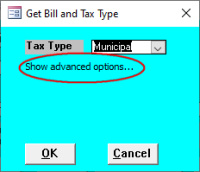
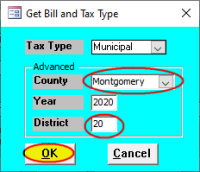
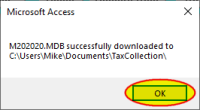
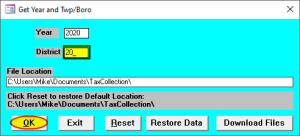
The "Get Year and Twp/Boro" form opens when the program starts up for the first time.
New Taxing District User
Most taxing districts store TaxColl2k data files on a network file server. You will need to provide the path to those data files the first time you run TaxColl2k. The easiest way to get that information is from another user in the office who already has access to it. For simplicity, I'll refer to the existing user's computer as the "old" computer and the one you are setting up as the "new" computer.
- Open the [Utilities] menu on the new computer
- Click on [Change Dist/Year]
- On the form that opens, make note of the "District" value.
- For school districts, this will be a letter.
- For counties, it should be three zeroes (
000).
- Click [OK] to close the form on the old computer.
- Click [Close] to close the Utilities Menu on the old computer.
- Click [Settings] on the Main Menu on the old computer.
- At the top of the Settings form, it will say "Data files are located in:".
- Make note of the exact file location from the old computer.
- NOTE: Your data location will likely begin with either a double-backslash (
\\) or a drive letter other than C: (e.g.,F:\,G:\, etc.), to indicate that the data is stored on your network and not the local computer.
- Open TaxColl2k on the new computer.
- The cyan "Get Year and Twp/Boro" form will open automatically
- Enter the "District" value from the old computer.
- Enter the "File Location" value from the old computer.
- Click [OK].
Make sure the new user has proper permissions for the data file location!
TECHNICAL NOTES
TaxColl2k runs inside Microsoft Access. If you don't have Microsoft Access on your computer, you will need to install the free Access Runtime from our website before installing TaxColl2k.
You don't need to worry about whether you have Microsoft Access or not. When you run our setup program, it will look for a suitable version of Microsoft Access. If it can't find it, it will let you know. At that point, you will just need to install the Access Runtime from our website and then re-run the TaxColl2k installer.
