Table of Contents
Wayne County Commercial Assessment
Microsolve Manual
The following manual will walk you step by step on how to access the Microsolve system to get Commercial Cost Reports
Note - You must be a licensed assessor to access the Microsolve system. You will also need to have the Assessor2k program open to access the login credentials
Step 1 - Connect
Since Microsolve is an cloud based resource, you must first go to the website to log in. Click the following link or type into your internet browser’s address bar: https://cloud.nemrc.com/
Step 2 - Enter Credentials
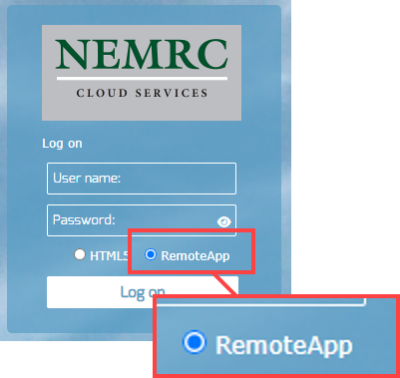
Now that you are at the login page, you must put in the credentials. You will also notice, just above the “Log on” button, there are 2 radio buttons. You want to make sure that the “Remote Desktop App” button is selected.
Access Credentials in Assessor2k
If you are a licensed assessor, you can click the [Microsolve Credentials] button in the "Assessors" tab on the Master Menu to view the login for NEMRC Cloud Services. This will be invisible to users without an assessment license.
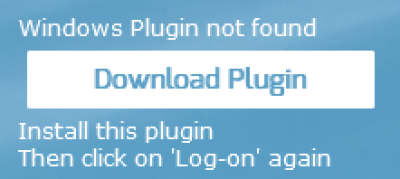
NOTE: If it is your first time logging in, or your first time in a while, you may receive an extra message saying, “Windows Plugin not found”. You can click on the “Download Plugin” button.
Step 3a - Run the Program
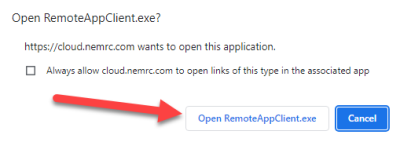
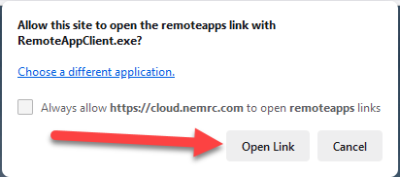
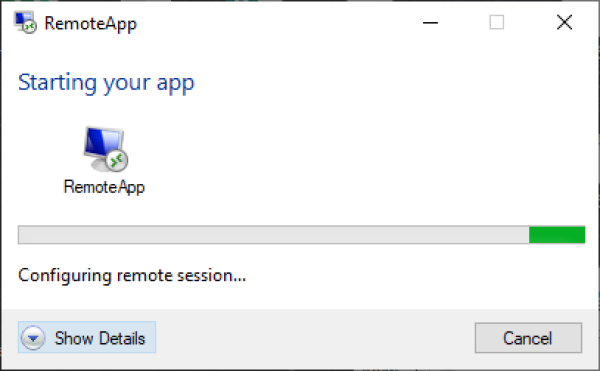
You will now be prompted by your browser asking for permission to run the program. Each browser displays a differently, but you want to allow the program to run. Then you will see a “pop-up” window that displays the app is starting.
Google Chrome
Mozilla Firefox
Microsoft Edge
Step 3b - Run the Program
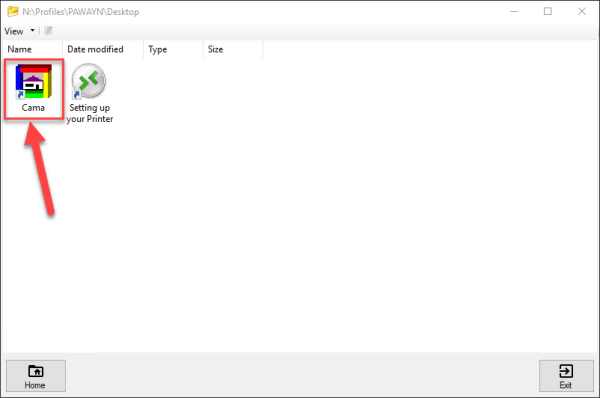
You will now see a program window open with two files in it. Double click on the Cama option
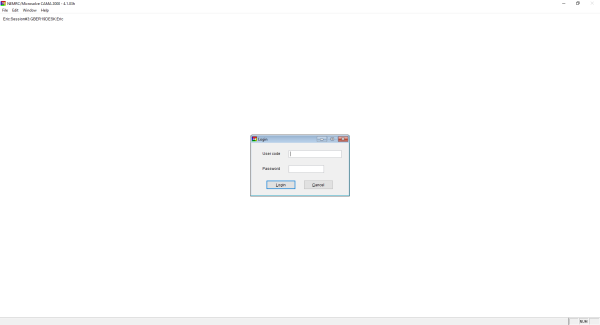
Now it is time to enter a second set of credentials Refer to Assessor2k's Credentials Section for USERNAME and PASSWORD
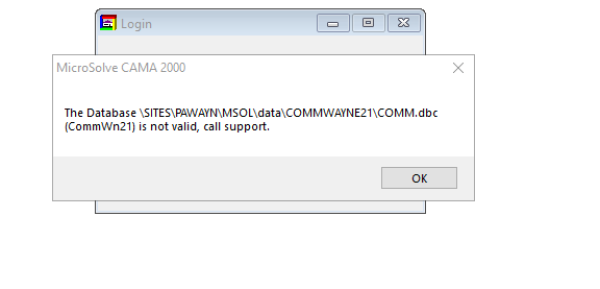
Although it appears to be an error, it is not. Click on the "OK" button and the program will continue to open
Step 4 - Using the Program
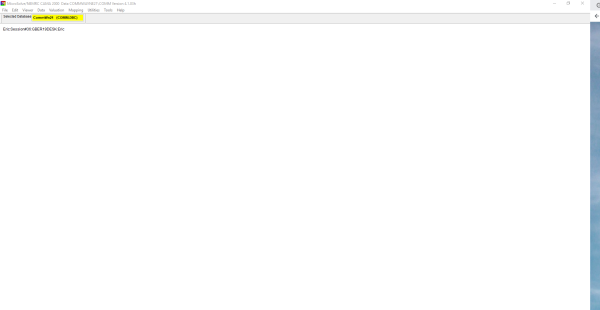
Now that you are logged into Microsolve, you can begin to find your way around the program. First, let's display some data.
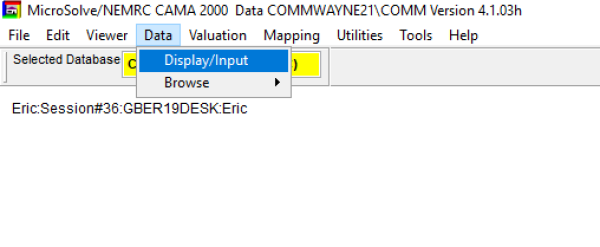
- Go to the top left corner of the program and locate the "Data" tab.
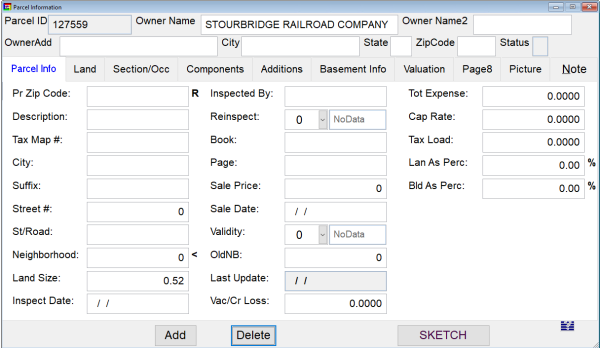
- Now, choose Display/Input. This will bring up the last property that was opened in the program.</li>
Now that we have some data showing, let's get the data we actually want!
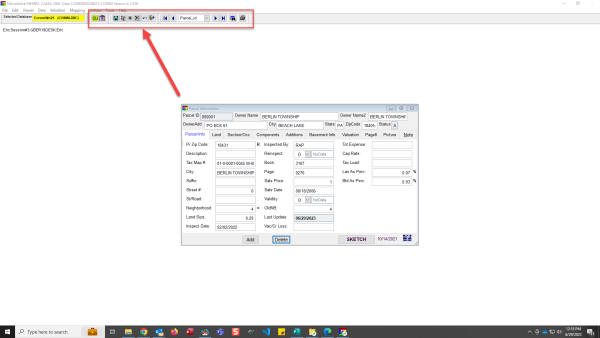
- First, in the "Toolbar" at the top of the screen, locate the "binoculars"
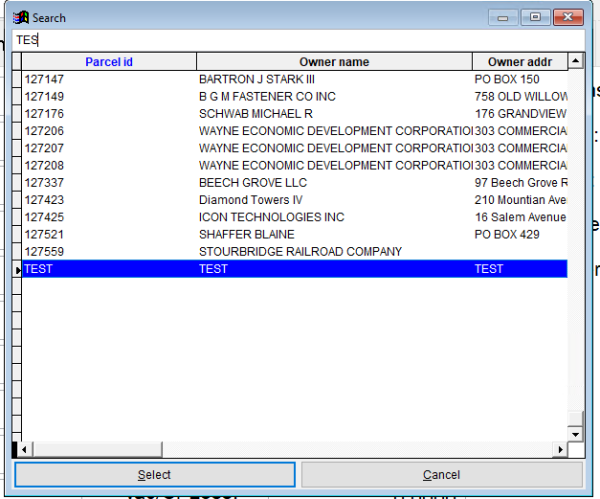
- Now we can enter the parcel number in the search bar to access the property we are looking for
- Unordered List Item"Double-Click" on the name/parcel you want to access and it will load into the viewfinder
- You are now able to edit this record, or you can gain access to the "Commercial Cost Report"
Important Note: If you are here to edit information, be sure to SAVE YOUR PROGRESS as you go. This can be done by clicking on the BLUE FLOPPY DISK icon in the toolbar.
Step 5 - Accessing the Commercial Cost Report
Use the following steps to access the Commercial Cost Report
- Go to the back up to the toolbar and locate the icon that looks like a building with a dollar sign on it tab.
NOTE: Be sure to save your work prior to running the report!
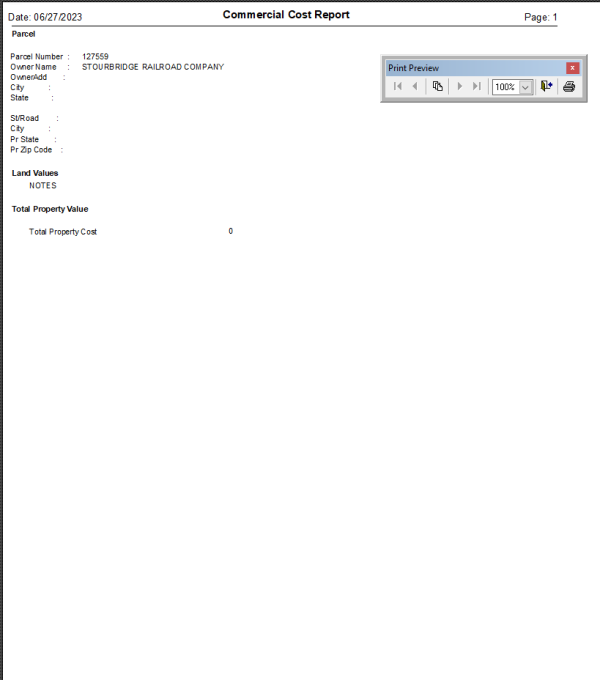
- Click that button and it will bring up the cost report
NOTE: The program can be slow, so we recommend you immediately go to the PDF version of the report. This can be done by clicking the printer icon on the report toolbar.
- Once you PDF comes up in your PDF viewer, you can print like any other document.
—-
Export Excel File With ALL DATA
The following instructions will teach you how to make a Microsoft Excel file out of all of the data in the database. IE. If you wanted to run a spreadsheet where all fields for particular parcels, or even filter results based on particular criteria.
- First, you must be logged into Microsolve. If you are not, follow the steps listed above.
- If you have a current parcel open, you must also close out of it by hitting the red x in the top right hand corner of the "Parcel Information" window
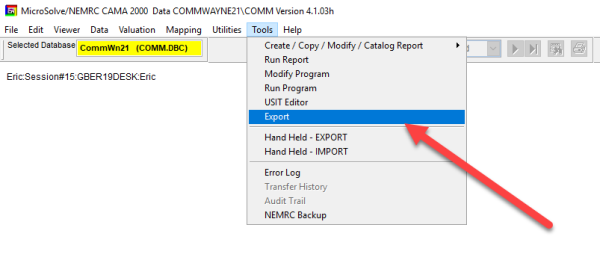
- Go to the toolbar at the top of the program and select "Export" from the "Tools" dropdown menu.
- This will bring up the Extraction Menu
- There is a default setting in the export menu. If you are satisfied with the choices selected, you can skip over the selecting fields and filtering sections.
Selecting Fields
You are able to customize what fields you would like to export to your spreadsheet. This can be done by the following steps:
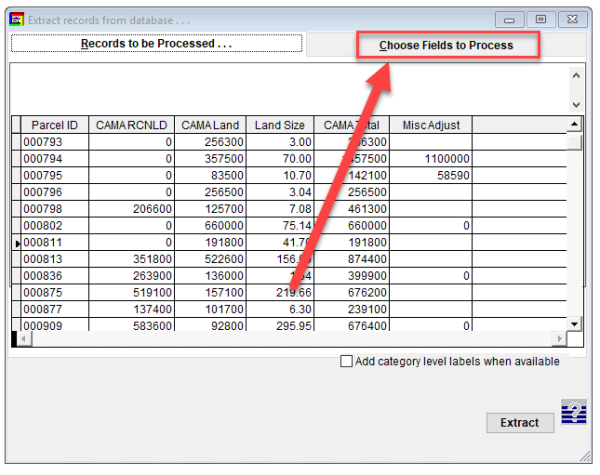
- At the top of the "Extract records from database…" window, you will see there is a tab named "Choose Fields to Process" Click on this tab
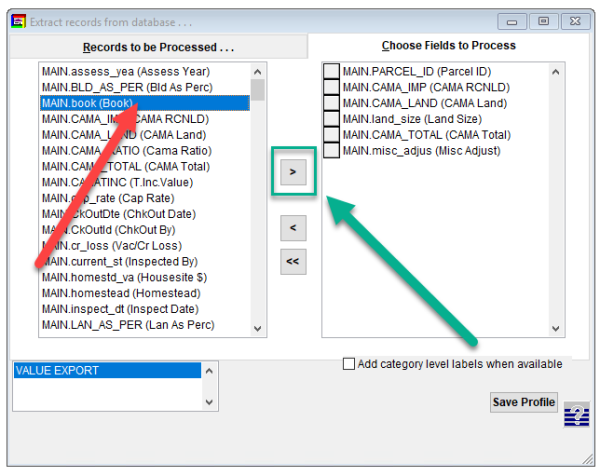
- In this window, the list of fields on the left is the fields you can choose from while the list on the right are the fields you would like to include
- For our demo, let's add the field called Book
- Scroll through the menu until you find the field you are looking for (for the demo, it's Book) and click so that the field you want is highlighted.
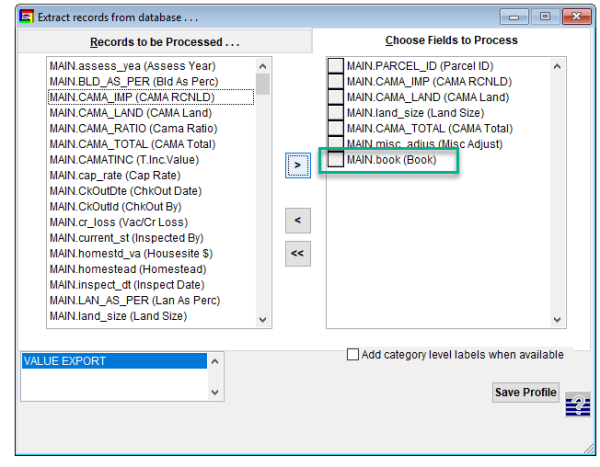
- To add to the list of included fields, click the "carrot" that is pointed to the right. You will now see that the field has been moved to the "Choose Fields to Process" column.
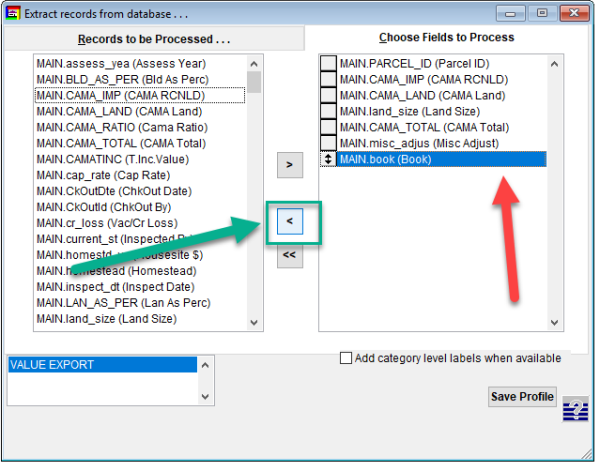
- To remove a field, highlight the field you would like to remove by clicking on it, then click the "carrot" that is pointed to the left
- To remove all fields, you can hit the "Double Carrot" icon, pointing to the left.
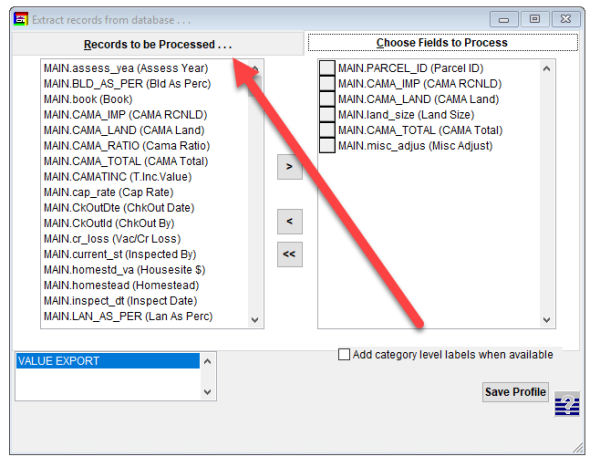
- When all desired fields have been selected, click on the "Records to be Processed" to continue the process.
Filtering Results
In addition to field customization, you are also able to filter your results by different criteria such as last names that match a certain criteria or values that are less than $500k etc
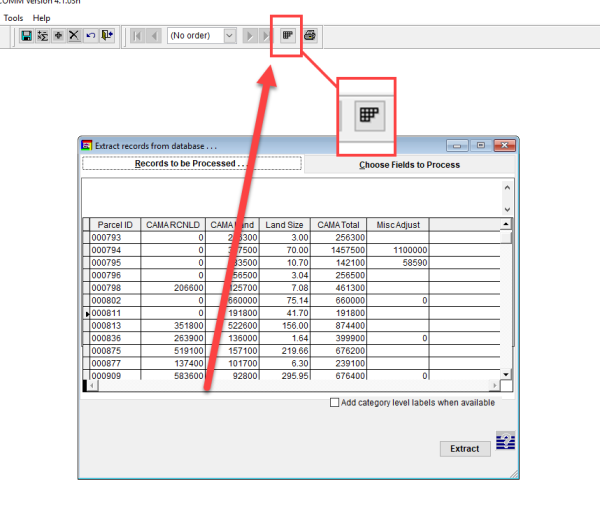
- To start, you now must find the "Filter Button" in the top of the main window.
- Clicking the Filter button will open up the Filter window
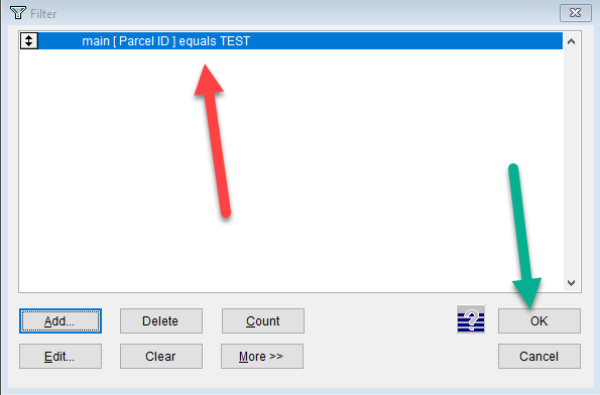
- To add a filter, click the add button
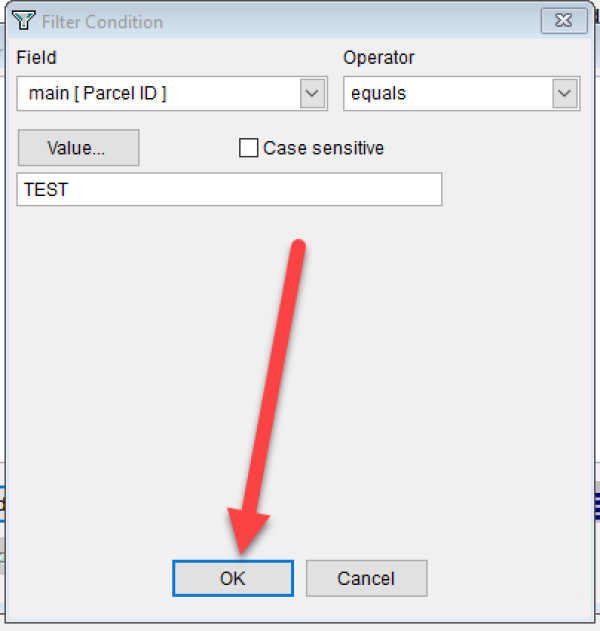
- Use the dropdown menus to select what field you want to filter, the operator (less than, equal to, does not equal, etc) and then the value.
- For our demo, we wanted to filter the fields to only show those records where the ParcelID is equal to "TEST"
- When you are satisfied with your choices, click the "OK" button to return to the Filter window and see your filtered results
Extracting Excel File
Now it is time for us to extract the excel file with all of our filtered selections
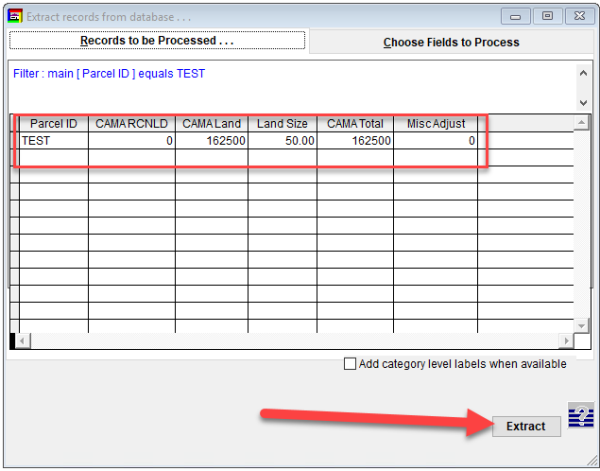
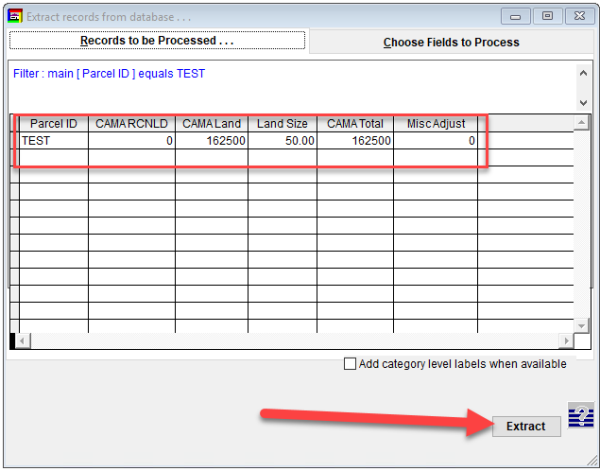
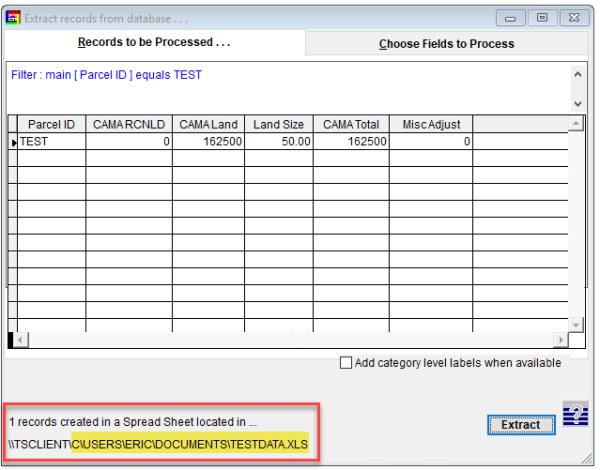
- You can see the results have been filtered to our specifications if we made any. Hit the extract button to start the extraction process.
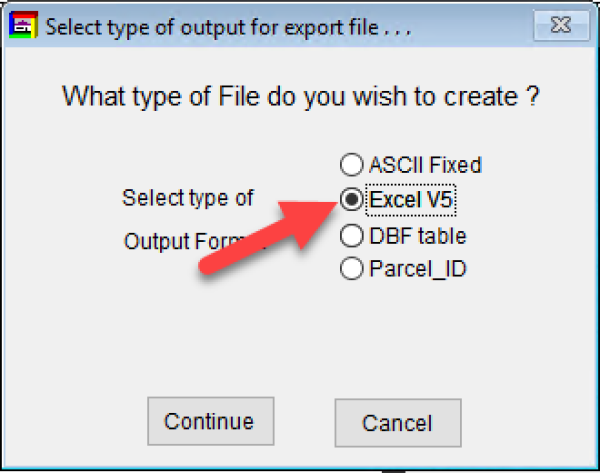
- There are several file types that you can choose, but for our example we are going to choose the "Excel V5" choice and then click continue
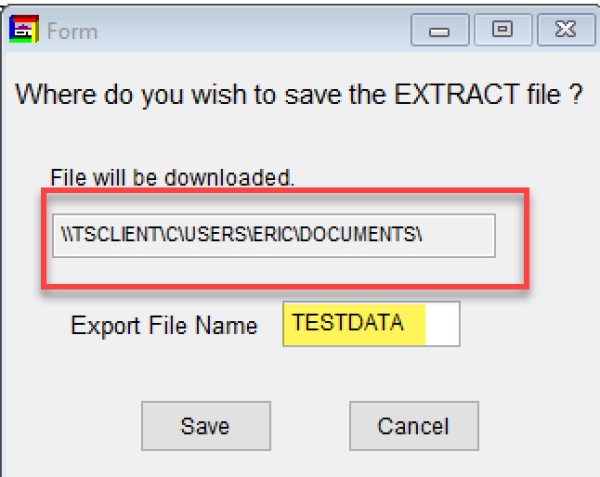
- Now it is time to give our file a name. You are only allowed to choose 8 characters, so attempt to make them meaningful.(EX. "R063023" ← Report June 30th, 2023)
- Once your file is named, click on "Save"
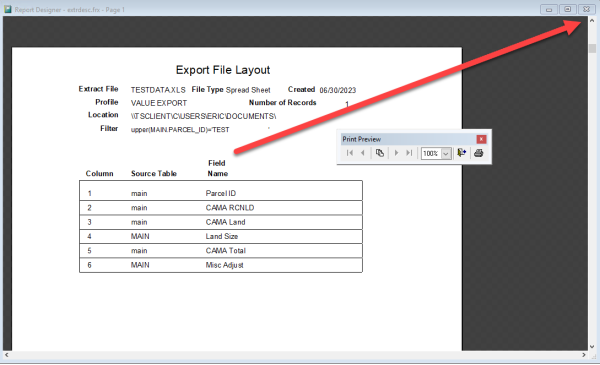
- The program will automatically open a confirmation report of what you exported. You can close this by clicking the "X" in the top right hand corner
- On the main export window, you will now see that your file has been exported by a confirmation note in the bottom left hand corner of the menu. That is the file path of your exported report. NOTE: For your computer, disregard the file path before the letter "C".
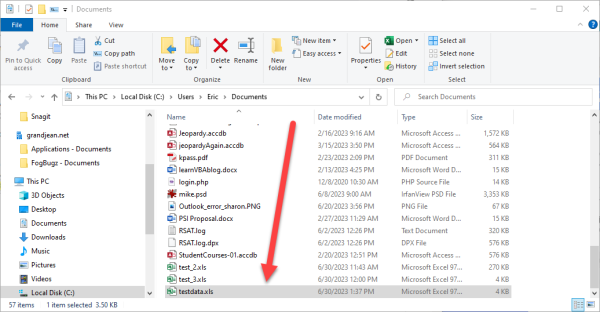
- Now you can open your file explorer and copy that url (C\USERS\….) and paste it in the address bar or navigate to your local "DOCUMENTS" folder.
- You will see our file located in the folder. Open it up to display your results.
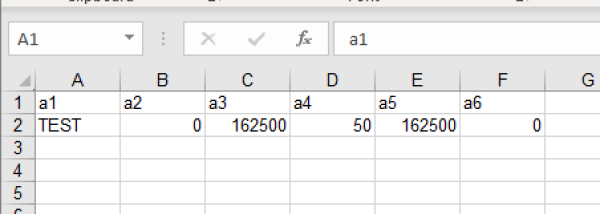 Note: At this point in time, the column names DO NOT carry over with the file export. Rename the top row with the appropriate column names you chose to include (ie. a1 ⇒ ParcelID, a2 ⇒ CAMARCNLD, etc) and save.

