Table of Contents
Voiding Non-Check Payments
These instructions are for voiding non-check payments. For payments that involve a printed check, refer to Void (and unvoid) Check.
Step 1. Void the paid invoice
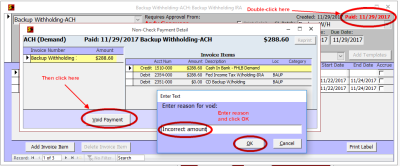
- Open the paid invoice
- Double-click on the payment date in the upper-right corner of the form
- Click the [Void Payment] button
- Enter a reason for the void then click [OK]

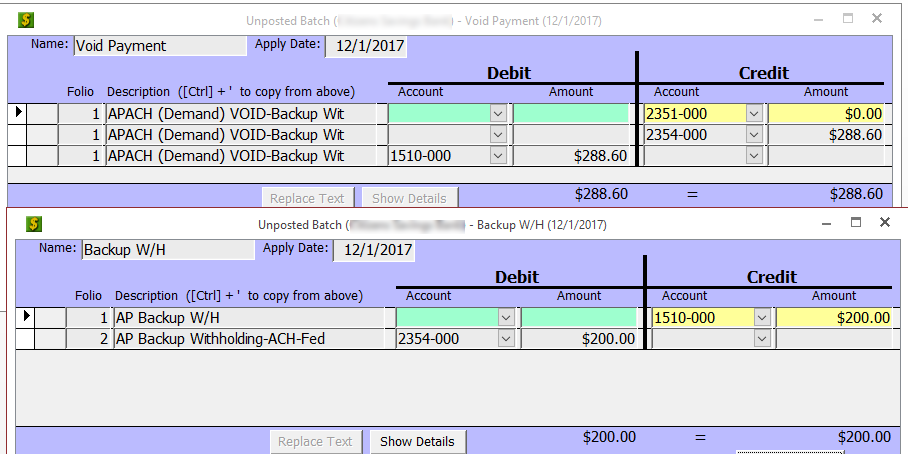
When you click [OK], the program will do the following things:
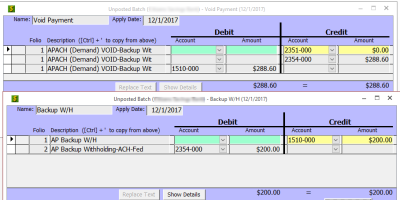
- Create an unposted reversing batch in the GL with an apply date of today
- Mark the original invoice as voided and set its Invoice Amount to $0
- Create an unpaid copy of the original invoice for modification if necessary
If you don't need to modify the invoice and re-pay it, you may simply delete the unpaid invoice and you are done.
If you do need to modify the invoice and re-pay it, continue with Step 2 below.
Step 2. Modify the new unpaid invoice
Open the unpaid invoice created in the previous step and make any necessary changes. Note that there is no need to change the Invoice and Due dates unless they are actually incorrect. Close the modified invoice.
Step 3. Pay the modified invoice
Click the check box next to the modified invoice then click [Pay Invoices]. The Pay Invoices form will open. You will probably want to change the "PmtDate" to today's date so that the Apply Date on the new payment batch matches the void batch created earlier. Close the form to complete the payment.
Step 4. Make and post batches
- Click the [Make Batch] button
- Switch to the GL and review the two batches that were created:
- Post the batches